Magic Keyboard For 11" iPad Pro: Unboxing & Review By Apple Explained
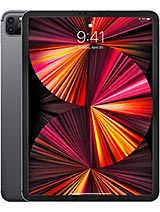
A portion of this video is sponsored by Paperlike. On March 18th Apple introduced new iPad Pro models, which added an ultra wide camera lens, a LiDAR scanner, and improved graphics performance. But what garnered even more attention was the announcement of an accessory called Magic Keyboard for iPad Pro. For the first time, Apple would offer an iPad keyboard with full-sized backlit keys and one millimeter of travel. But that’s just the beginning. Apple also managed to include a trackpad that actually clicks, and a USB-C port for pass-through charging, all built in to a compact folio cover that magnetically connects to the iPad, suspends it in mid-air, and has an adjustable viewing angle.
Therefore allowing the iPad Pro to deliver a true notebook experience that users have wanted for almost a decade. But as you can imagine, this accessory with all its incredible features doesn’t come cheap. The Magic Keyboard for an 11 inch iPad Pro costs $300, while the 12.9 inch variant costs $350. Now in this video we’re going to take a look at the 11 inch model, so you can decide for yourself if it’s worth the premium price. This is Greg with Apple Explained, and if you’d like to see more in-depth reviews like this one, don’t forget to subscribe.
Now I ordered my Magic Keyboard from Apple’s online store and it arrived one week later. The front of the box features a product photo as well as its name at the top, and some illustrations on the back demonstrating how the accessory would appear in use. After lifting the lid you’ll find the Magic Keyboard itself, and after removing it from the box, you might be wondering where the documentation is. Apple typically includes a cardboard envelope filled with paperwork in front of or behind the product. But with this accessory, they actually integrated the envelope into the protective packaging that’s wedged between the cover.
It slides out beautifully, and although there aren’t any Apple stickers, there is a very simple manual instructing users how to attach and adjust their iPad, in addition to using the USB-C port for charging. Now I should mention there aren’t any extras included with this keyboard. Unlike the Magic Mouse or trackpad, it doesn’t feature a USB cable, since the keyboard itself doesn’t need to be charged. It’s simply powered by the iPad’s battery while in use, thanks to these three metal contacts on the inside of the cover that are also found on the iPad Pro. When it comes to the size and weight of this keyboard, people often point out how heavy and thick it is.
So let’s put its size into context. An eleven-inch iPad Pro weighs in at about one pound. The same iPad with a Smart Cover would weigh six ounces more. While a Folio Keyboard would add eleven ounces. But what about this new Magic Keyboard, well attaching it to your eleven inch iPad Pro would add twenty-two ounces.
That means going from using your bare iPad to using it with this Magic Keyboard would more than double its weight. But keep in mind that you’d be using your iPad more like a notebook than a tablet. Likely by resting it on your lap or a table, which makes its weight less of a concern. Also, there are benefits to this, like the keyboard setup being much less top heavy, which prevents tipping while resting on a more unstable surface like a lap, pillow, or bed. Now the weight distribution isn’t as optimal as a notebook, but it’s a noticeable improvement over the Folio Keyboard.
But what about portability? After all, people who choose the smaller 11 inch iPad Pro are more likely to carry it from place to place, compared to those with the larger 12.9 inch model. Well, I’m going to compare this eleven-inch iPad & Magic Keyboard combo to one of the most portable notebooks Apple has ever made. The eleven-inch MacBook Air, which weighs just two point four pounds and has a maximum thickness of seventeen point eight millimeters. So how does the eleven-inch iPad Pro plus Magic Keyboard measure up? Well, it weighs two ounces more than the Air, but has a maximum thickness that’s actually two point eight millimeters thinner. It’s also two inches shorter than the Air, which makes it very compact and easy to fit inside a bag.
But most people have notebooks much larger than the eleven inch MacBook Air, like for example, my sixteen inch MacBook Pro. Which is connected to all sorts of external devices like a microphone, SSD, and display. That means taking my notebook with me, isn’t exactly an effortless process. That’s why having a notebook experience available on my iPad is a total game-changer, since it’s already a super portable device. I can just throw it in my bag, not even notice it’s in there, and write my video scripts on a comfortable keyboard complete with a trackpad, no matter where I’m at.
The only issue I’ve run into while using my iPad in cafes or even outside is how reflective the screen is. It causes me to try to angle my iPad away from the light source, and even have to move to a completely different area. So to solve this issue I’ve actually been using this matte paper like screen protector that diffuses ambient light really well and allows me to focus on my screen’s content without any reflections getting in the way. Now if you use an Apple Pencil with your iPad there’s an additional benefit, after all, the company who makes these is called Paperlike for a reason. Their matte protector actually mimics the texture of paper, so you have some friction when writing or drawing without any slippage from the iPad’s glass display.
It was actually really easy to apply since they not only include instructions and tools to do it properly, but also a video tutorial to make things super straightforward. So if you want to protect your iPad’s screen, take care of those annoy reflections, and take your Apple Pencil experience to a new level, I recommend checking out what Paperlike has to offer, just click the link in the description to get your Paperlike and free shipping worldwide. Now, there are tradeoffs to having such a compact keyboard accessory. The biggest being its trackpad. While it has a generous amount of width, it’s narrow height does take some getting used to.
When I used vertical gestures like scrolling through web pages or swiping up with three fingers to go home, my hand would run off the trackpad area quite often, cutting the gesture short. Sometimes the action would register, other times it wouldn’t. So it took time learning how to minimize my vertical gestures as much as possible, in order to perform them reliably on the trackpad. But the good news is that I never had that problem with horizontal gestures. Now when it came to the trackpad’s physical click, it was something of a disappointment.
While you can click anywhere on its surface, the amount of force required to register a click was too high for my taste. It led to mis-clicks since the cursor may’ve moved slightly while I was pressing down. Also, it caused some hand fatigue after using it for a few hours. To remedy these problems, I turned on tap to click in the iPad’s settings, and found myself enjoying a much more comfortable trackpad experience. But what about the keyboard? Well, it turned out to be a much easier adjustment than I expected.
The smaller keyboard does feel a bit claustrophobic at first, but after just fifteen minutes of typing, my fingers were already comfortable with the smaller area. I think a big part of this comfort is due to the individual keys themselves. They’re not miniaturized versions of notebooks keys, and they’re not covered by a mushy fabric like the Folio Keyboard. These are full-sized, hard-plastic key caps complete with scissor mechanisms, ample travel, and even backlights. Which auto adjusts to ambient lighting, and can even be manually adjusted in settings.
These features make the typing experience surprisingly enjoyable despite the keyboard itself being smaller. Now when using your iPad with this accessory and enjoying more of a notebook experience, it becomes clear why Apple included a passthrough USB-C port. Not only does it give you the choice of charging your iPad from the left or right side, depending on your situation. But it also frees up the iPad’s port to connect to other devices like a camera, microphone, or display. Now in my experience, the iPad charges just as quickly the Magic Keyboard’s USB-C port, although it doesn’t support data, only passthrough charging.
Now in terms of battery life, you can expect this keyboard to deplete your iPad’s battery about 10-20% faster, depending on how much the keyboard’s backlight is used. And since I primarily typed scripts, the backlight was almost always on when I used the keyboard, so I definitely noticed a decrease in my iPad’s battery life. Although I should mention it still lasted substantially longer compared to typing scripts on my MacBook Pro. Another huge benefit of this Magic Keyboard is the hinge design. It allows you to precisely adjust the viewing angle between ninety to one-hundred thirty degrees.
A huge improvement over the two fixed viewing angles offered by the Folio Keyboard, but still not as generous as most MacBook’s one-hundred seventy-eight degree viewing angle. And there’s a good reason for this. If Apple had allowed the Magic Keyboard’s hinge to extend beyond its current limit, it’d throw off the setup’s weight distribution causing it to be very unstable and likely to tip backward. There were also questions about why Apple didn’t include a row of function keys at the top of the keyboard, and it’s because they would be extremely frustrating to access. The bottom of the iPad would block your fingers from reaching the function row comfortably, and likely cause people to wonder why Apple included a function row at all.
It’s important to keep in mind that this keyboard, while a very impressive piece of technology, does have compromises. But Apple did their best in mitigating most potential hangups. For example, there may not be any dedicated function keys, but you can utilized the long list of keyboard shortcuts to quickly perform actions like switching apps, going home, taking screenshots, or even opening Spotlight without your fingers ever leaving the keyboard. And if you become annoyed that there’s no escape key, like I did, you’ll be happy to hear that Apple allows you to remap modifier keys to perform the escape action. Now the last thing I want to talk about is the Magic Keyboard’s cost.
This 11 inch model is $300, which is a steep price to pay for an iPad accessory. And if you’re having trouble deciding whether or not to make the purchase. Consider how you’re using your iPad Pro today. Are you just watching YouTube videos, browsing the internet, and checking email? If so, the addition of a keyboard and trackpad wouldn’t really improve the experience of those tasks. But if you’re taking notes, writing essays, or using content creation apps like iMovie or GarageBand, you’d likely appreciate the notebook experience that the Magic Keyboard provides.
I’ve not only been using my iPad more thanks to this keyboard, but its freed me from being so reliant on my MacBook Pro, which isn’t as portable or convenient to carry around. Alright guy thanks for watching, and if you enjoyed my review, don’t forget to like and subscribe with the notification bell, so you’ll be notified of future product reviews just like this one.
Source : Apple Explained


