Samsung Galaxy Z Flip Camera Review By Gab Scanu
I'm very excited about today's video because we've got a new toy to play with from Samsung and if you've read the title of this video, I'm sure you already know what it is. Listen to that that's so satisfying. So today we are going to be playing with the Samsung Galaxy z. Flip now Samsung sent me this phone a couple of weeks ago, just to play around with test and kind of just do whatever I want with it. I have to say it's actually grown on me quite a lot apart from the galaxy colorway, which is an absolute fingerprint magnet. I actually really like this phone.
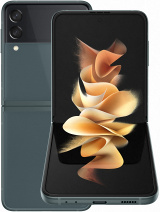
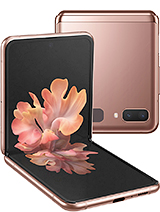
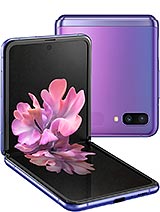
It's got some pretty awesome features which I thought we would test out today, so before we get stuck into it. Let's go over the specs of the Galaxy Z, flip, real quick, so the z flip has a 6.7 inch. Infinity display and Samsung is saying that this is the first phone made out of ultra-thin folding glass. It's got multi-active window display, meaning basically, if you fold the phone or if you want to use the phone and divide it into two halves, you can do you can have one thing at the top another thing at the bottom: half of the display, probably one of the coolest features about this phone. Apart from the fact that it folds is the front display.
So if I press the on button there, you can see the display comes up with the date and the time and your battery and all the rest of it. If I double tap that that turns into a front camera. So if you want to take selfies or take photos um with the phone actually shut, you can do all of that and access all of that information without having to actually open the phone. But I guess the whole point of a flip phone is, so you can do that whip it out and flex on everyone else. It's got a normal non-folding phone all right.
So obviously, the massive difference between the z-flip and any other phone on the market is the fact that it can fold and the thing that I like the most about it is it doesn't just fold, but it's free-standing, meaning that if I open it up, it's going to stay in position like that. When I saw this, I immediately thought well that kind of removes the need for a tripod um when it comes to photography. So I figured I'd head out tonight, hit the streets of Sydney and try and capture some long exposure. Photography using this freestanding flip tripod phone. I don't know what you want to call it whatever you want to call it.
I thought we would go out and capture some long exposure, photography. Some time-lapse photography, just testing that theory of using this purely by itself, without the use of a tripod all right. So before we go out and start shooting with this bad boy, I would love if you would take a second to hit that subscribe button. If you haven't done so already and drop a like down below it's going to help me out a lot, and it's going to help me to continue creating awesome content for you. So if you could do that, you are an absolute legend, mate you're, a legend enough talking, let's go hit the streets and see what we can capture with the Samsung Galaxy z, flick.
Basically, we've come to this location here, which is like an overpass to the freeway in Sydney um, and it kind of overlooks the city and the freeway down below, which is a really cool backdrop. And I guess the game plan is to set up the z-flip on the edge of this little ledge here when we're at a good height, which means that we can angle the phone up and down and once we've framed the photo correctly with the flip, we'll shoot a long exposure, so we'll adjust the ISO and set that to the lowest possible, and then we'll open up the shutter speed for as long as possible on the z-flip to hopefully get some cool light trails below, and we'll see how it goes just by itself. Without a tripod, you can adjust the shutter speed and the ISO, but you can't adjust the aperture or the f-stop, which means I can't get the actual camera dark enough to take the long exposure. So I brought along the little um polar pro ND filters, we're trying to get a shot at 50 ISO, which is the lowest ISO. They can go and 10 second shutters, using this little guy, which is ND 18.
I think which is going to bring it down considerably and make sure that we capture everything within that 10 seconds. So hopefully that works a little better than just using the phone by itself all right. So we ran into a few issues when we were trying to shoot the long exposures last night, mainly being that we couldn't change the f-stop, which would considerably darken our image, which would allow us to leave our shutter open for longer. But we had to get a little creative and find some ways around that to kind of catch what we wanted. So this was the first attempt that I shot here.
This was shot at an ISO 50 with a shutter speed of two seconds, meaning that the actual camera was open for two seconds, and we captured everything within that two-second time period. So, if I show you the before, you can see that it's a little overexposed, but we do have some nice detail in the sky. It's just the highlights are a little blown out, but luckily, because I can shoot raw on this, I was able to bring it back by applying one of my presets and just bringing down those highlights and giving the image an overall, more rounded sort of clean look with a shutter of two seconds, though we weren't really able to capture those nice long, light trails that we were looking to get and yeah. I did think that this shot was a little overexposed just on first impressions. So for my next attempt, I actually decided to get a more well exposed image and leave the shutter open for even less time, and this one here is shot at ISO 50 with a shutter of 0.5 of a second. So the camera was open for half a second and captured all the movement within that half a second.
So again, we have a little of a light trail going on here, but nothing like what we really wanted to capture and obviously the sky and everything is a lot darker. I use the exact same edit on this shot here and although it's better exposed, it's not really what we were going after. So the main issue was that I couldn't leave my shutter open for long enough without just completely overexposing and blowing my image out, so I had a little ND 18 that I held over the lens and that brought down the exposure considerably, which allowed me to leave my shutter open for 10 seconds and capture this shot here. So, as you can see, this is much more the type of shot that we were trying to get you can see. We've got nice long light trails in every lane on the freeway, because the shutter was open for 10 seconds.
There was a lot more time for cars to actually pass through and go up and down the freeway during that time period and because we had the ND filter over it, we could actually leave our shutter open for that long without over exposing our image- and I think a little of the ND filter actually came into the edge of frame here, but I actually don't mind this as an effect. It almost looks like there's something in the foreground, or it could be like a lens flare or something so for this shot. Here I actually applied one of my presets again and then made a few adjustments to the shadows, brought down the temperature a little to make it cooler more of a night tone, and I went over with an adjustment brush and painted over those light streaks on the freeway just to bring them out, make them pop and make them a little more vibrant. Make them the focus of this image here. So all in all, I captured some good shots, but there wasn't one that I was completely happy with.
So I actually decided to lay out all of these images in photoshop and pick and choose the best elements from each to create this image here, which I'm really, really happy with. So, as you can see, I kept all those light trails and that little flare off on the side. I basically just put them on two separate layers and then masked out the sky, so that we have an evenly exposed sky and foreground just to create an overall, more even clean, looking image. So while the z-flip was set up, and we were capturing stills, I also decided to capture a time-lapse and I left it rolling for about five to ten minutes, ended up with a pretty cool time-lapse of the freeway which managed to capture all those light trails and all the cars that passed through during those few minutes. So I threw that into premiere pro threw on one of my cuts made a few other color adjustments to bring down the exposure, because I did think that was a little overexposed as well, and then I decided to bring it to life through some sound design.
So for the sound design aspect of this, I headed over to epidemic sound, which is where I sourced all of my music and sound effects from, and I searched up traffic sound effects. City ambience, I just went in to pick and choose a few different, sound effects that I think would really bring this to life. I downloaded them layered them and stuck them underneath my clip, and it created this now. This video isn't sponsored by epidemic sound, but I have created a link for you guys to get one month free, so you can sign up test out the platform. It's where I source all my music and sound effects from it's all royalty free.
You can use it across any platform. You want there's a link down in my description. If you want to check that out and test out some awesome music and sound effects that they've got over there on their platform, so all in all last night's shoot was a success. We managed to capture an awesome time-lapse and create a cool little clip out of that, and we got some really cool, still images as well, and a really cool long exposure shot. That kind of proved my theory right that you can use this as a self-standing, tripod camera, and it's awesome to see the kind of tech that Samsung are coming out with and just the things that you can do with a device, that's so small and can fit in your pocket.
So if you enjoyed this video be sure to drop a like down below. Let me know what you thought down in the comments subscribe. If you haven't done so already, and I will catch you in the next video you.
Source : Gab Scanu


![Samsung Galaxy A7 [2018] with Triple Camera // A Glimpse into the Future — EOTO Tech](https://img.youtube.com/vi/Wly9Mx2whdQ/maxresdefault.jpg )


