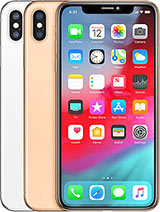
iPhone XS Max Battery Replacement By Phonesavers
So to change the battery and an iPhone XS max first power off the phone fully middle school, so be careful replacing yourself. You got to be careful because you fold it this way. Power button is here, and you have to fold it over that way away from the two volume buttons. So you don't break the ribbons now to make this job easier. You could heat it first lightly. So there's you have to pull this away this way lightly very lightly and fold it open there.
You go so there's a plate towards the left of the phone. As you see it, you take out those four screws and the battery connector shall be there we'll, try and point to it here, be careful not to scratch the board. Take your time now price up the battery. You need to heat the back of the phone heat it to a point where it's hot, but not too hot- that you hold your fingers spray. Some contact cleaner on after you heat it up away from the board just under the battery.
That will dissolve the glue, be very careful! You don't scratch the inside. Underneath the battery, where that black circle is because that's the wireless charger, don't scratch this put some glue. Let's try a few spots, not too much clean your hands, don't get glue all over the phone now get your battery. That's already been boosted connect the battery first before you situate the battery in the phone. It just helps.
I think it's better. That way. Now, I'm balancing all these things together because I'm used to it, but you might want to hold the LCD with something so connect the battery up and put the plate back down on top of the connector on top of the battery connector on the board, then you situate the battery to where you want it, be careful all the time of the ribbon. That's there going from the battery to the connector board. You might want to price that down a bit there because it might stick up a bit, and you won't be able to close the LCD properly if it's rising above the battery put back any more screws you need to put back.
I was going to take the LCD off to show you, but I changed my mind, because if you can hold the LCD it takes, it can take a bit of time off the job with these phones when you're connecting the battery and the LCD, and things like this never connect the battery on a board on an iPhone uh. When the LCD is disconnected from the board because it will blow the board a lot of DIY enthusiasts make that that mistake. It blows an icy and LCD IC, so you'll have the phone be working, but you'll have a black display, so do not connect the battery on the board on an iPhone. If the LCD is not connected before you connect the battery there, you go, which is working, fine, make sure the phone is clicked in properly there. You go back to two screws in the bottom of the phone check.
It's work anyways. Thank you for following this tutorial, and please subscribe below and keep follow us on Twitter and follow us on Instagram and also on Facebook and tick-tock and Snapchat. Thank you.
Source : Phonesavers


![Google Pixel 5 inch [Battery Life Review]](https://img.youtube.com/vi/RpwyICAJXhg/maxresdefault.jpg )


