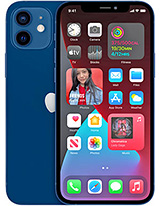
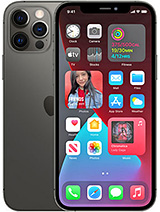
IPHONE 12 | BATTERY REPLACEMENT By iParts4U
If, your iPhone 12 battery is broken, or if your battery capacity has lowered, this guide will show you how to fit a new battery to your iPhone and restore it to its like new performance. We also have a written version of this guide, which we recommend reading you can find the link for the guide in the description below. If you want to see more videos like this from us, then click the subscribe button and the notification bell, so you're notified when we have new content available. Please remember that ipartsview assumes no responsibility for damage, injury or loss during repair, and you follow this guide at your own risk. All the tools we've used to complete this repair are linked in the description below before starting this repair discharge. Your iPhone battery below 25 as accidentally puncturing a charged lithium-ion battery can cause it to catch fire or explode.
You'll also need to turn your iPhone off before, starting once you've done this, you can eject your sim card tray with a sim card, eject tool or paperclip at the bottom of the iPhone unscrew and remove the two pantalone screws in the next steps we'll be opening the iPhone's display. This will compromise its waterproof seals, make sure you have replacement seals ready before continuing with this guide. We have our replacement seals linked in the description below to start the removal process. You'll need to heat your iPhone, we're heating, our iPhone at 100 degrees Celsius, using the forward fw360 heater leave the phone to heat up for a maximum of two to three minutes. Apply your suction cup to the bottom edge of your phone don't place it too far.
Down, though, avoid putting it at the very edge of the glass pull the suction cup away from the phone. This will create a gap between the front panel and the rear case. If you're struggling to create the gap, it might be due to the phone having cooled down heat the phone up and try again using a pry tool or plastic card begin. Prying the bottom edge of the phone open. You can use some IPA to help loosen the screen.
If you're struggling, be careful not to insert your prying tool too far into the phone, a few millimeters will be enough. Otherwise, you risk damaging the cables connecting the screen. If you insert the pry tool too far, once most of your screen has come loose, remove your suction cup and begin prying, the screen off with your hands with a small amount of force, the screen should come free from the adhesive and your phone should open like a book now, the screen is off: you'll need to disconnect the flex cables. There are two protective shields you'll need to remove. The first is covering the front sensor: assembly flex.
The second is covering the battery display and digitizer flex cables, remove the screws and both protective shields. So first we'll disconnect the battery connector from its socket on the logic board, followed by the display, cable, the digitizer, cable and then the front sensor assembly flex at the top of the phone after these are all disconnected. You can remove the screen from the phone next, remove the screws for the loudspeaker and remove the loudspeaker with a pair of tweezers now unscrew and remove the sim card reader connector cover then using a spider pry, the antenna flex out of its socket, along with the sim card reader flex. Next unscrew, the two sim card, reader tactic engine cable, connector bracket, screws you'll, then be able to disconnect the tactic engine flex and unscrew. The last two screws securing the sim card reader down.
You can now remove the sim card reader. There are three screws holding the tactic engine, remove all of them, along with the tactic engine, put your phone back on the heater at 75 degrees. So you can start the process of removing the battery. The battery is secured to the case with four stretch: release adhesives you'll need to remove these in order to remove the battery two of the adhesives are located on the bottom edge of the battery and the other two are located on the top edge. Each individual adhesive has a black pore tab at the end, which is lightly stuck to the edge of the battery.
When the adhesives are stretched, they lose their stickiness using a tweezers pull down the first stretch, release adhesive, pull tab, don't jab the battery with any sharp tools as a punctured battery may leak, dangerous chemicals or catch fire. Slowly put the adhesive out from under the battery and try to apply enough tension for the adhesive to begin unsticking, but don't pull too hard that it rips for the best grip on the adhesive, keep twisting the adhesive onto the tweezers. That way, the pressure you're applying will remain consistent and even across the adhesive try to pull the strip away at a low angle. So the strip doesn't snag on the edge of the battery. If the adhesive strip does break off use the tweezers or your fingers to try and retrieve it, it's important not to try and retrieve it by prying, underneath the battery, if any of the adhesive strips break off underneath the battery and can't be retrieved.
Move on to the other strips be careful not to fling the battery from the iPhone as the final adhesive strip comes out once you've removed all the battery adhesives, you can remove the battery with your fingers, apply some IPA to a clean cloth and wipe down the inside of the phone where the battery had previously been sat to fit. A new battery you'll need new adhesives. We've linked our adhesives in the description below start by peeling away the two protective liners from the adhesive once the adhesive is exposed, be careful not to get it dusty or dirty line up the adhesives and slowly stick them down to the back side of the battery make sure the two shorter strips are nearest to the battery cable connector and make sure the strips are centered so that the two pairs of black tabs protrude evenly from each side of the battery. Once the adhesives are stuck to the battery, you won't be able to reposition them so make sure you're careful when applying using your fingers, firmly press the adhesive strips into place and then press all four black tabs into place before fitting the battery reassemble, the tactic engine sim reader and loudspeaker bad to fit the battery peel away the final large liner to expose the adhesives carefully position the battery and place it into the phone firmly press, the top and bottom of the battery into place. This will help the adhesive stick to the rear case to replace the waterproof seals on your iPhone start by removing the old adhesive.
That's located around the parameters of your iPhone use, a tweezer to slowly pick and pull the adhesive away and clean the areas of the case where you remove the adhesive with a cloth and some IPA grab your new waterproof adhesive and peel away. The protective liner line up the adhesive, with the top edge of your iPhone case and gently press. It into place use a spider to firmly press the adhesive into place across all four corners use, tweezers to peel away the second protective liner from the adhesive and then peel away the final thin protective strips that are stuck to the adhesive. You can now reconnect your screen to the logic board and reattach the protective shields. Once you have your new screen's cables connected power, your phone on and check that everything is working correctly, make sure you power your phone back down before continuing carefully align the top edge of the display, with the top edge of the phone's body and slowly lower the bottom of the display into place and apply gentle pressure to click it into place.
Lastly, refit your pantalone screws on your sim tray to get the most out of your new battery you'll need to calibrate it charge your battery to 100 and continue charging it for a further two hours then use your iPhone until it turns off due to low battery then charge it to a hundred percent.
Source : iParts4U


![Turn Your iPhone into a Spy Camera Using Your Apple Watch [How-To]](https://img.youtube.com/vi/VKa9kAtjapI/maxresdefault.jpg )
![iPHONE SE (2020) vs PIXEL 3A [Best $400 Phone?] In-Depth Comparison](https://img.youtube.com/vi/V4mqZ0j8mEc/maxresdefault.jpg )


