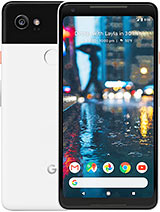
Google Pixel 2 XL Screen Replacement (Fix Your Broken Display!) By Real World Review
Hello everybody, my name is Matt, and this is real world review today. I will be showing you how to replace the screen on the Google Pixel to excel. Surprisingly, all you need for this repair is the part, a blade playing card of some sort and heat, since the part is very fragile. I would recommend taking your time and working on a few phones before breaking into this one. So we start by heating up the edges of the screen to loosen up the adhesive after about 30 seconds of heat, grab the blade and lift the screen just enough, so you can get a carving if you're attempting to replace the screen and don't care about the plastic OLED under it, then you don't have to be too careful when you're doing this repair. If you're trying to preserve the OLED panel, make sure you get the card under that panel, slowly use this card to cut through the adhesive, adding heat when needed you once the screen is loose, you can lift it up and tilt the screen over to the left.
Next, you want to remove the plug, covers I, recommend using a plastic spider to remove these pieces once they're gone, you can use the spider to remove the cables, regardless of how crack the screen was make sure to remove the glass. That's left on the frame you next, we can test the new screen to see if it works, and it does. The waviness you see is from the camera, not the phone. Now we want to make sure to add some new adhesive on the corners, because we cleaned up the old adhesive make sure to cut it. So it's not blocking any sensors or microphones also make sure that the OLED panel won't touch the adhesive, because it could cause issues with the screen you next we will move over the front camera ring and the top speaker grill, don't forget the bottom one as well.
Now we are ready to install the new screen plug in the OLED and digitizer cables and put the covers over them. Now we will set the screen in place and push on all sides to make sure that the adhesive grabs once everything looks nice power it on and make sure it's working and that's it I hope this video helped you out. If you have any questions, leave them in the comment section below or on Twitter, at Matt, Farah, WR and feel free to follow me on the social media listed above also make sure you subscribe for more how-to and review videos thanks for watching.
Source : Real World Review
Phones In This Article
Related Articles
Comments are disabled
Filter
-
- All Phones
- Samsung
- LG
- Motorola
- Nokia
- alcatel
- Huawei
- BLU
- ZTE
- Micromax
- HTC
- Celkon
- Philips
- Lenovo
- vivo
- Xiaomi
- Asus
- Sony Ericsson
- Oppo
- Allview
- Sony
- verykool
- Lava
- Panasonic
- Spice
- Sagem
- Honor
- Plum
- Yezz
- Acer
- Realme
- Gionee
- Siemens
- BlackBerry
- QMobile
- Apple
- Vodafone
- XOLO
- Wiko
- NEC
- Tecno
- Pantech
- Meizu
- Infinix
- Gigabyte
- Bird
- Icemobile
- Sharp
- Karbonn
- T-Mobile
- Haier
- Energizer
- Prestigio
- Amoi
- Ulefone
- O2
- Archos
- Maxwest
- HP
- Ericsson
- Coolpad
- i-mobile
- BenQ
- Toshiba
- i-mate
- OnePlus
- Maxon
- VK Mobile
- Microsoft
- Telit
- Posh
- NIU
- Unnecto
- BenQ-Siemens
- Sewon
- Mitsubishi
- Kyocera
- Amazon
- Eten
- Qtek
- BQ
- Dell
- Sendo
- TCL
- Orange
- Innostream
- Cat
- Palm
- Vertu
- Intex
- Emporia
- Sonim
- YU
- Chea
- Mitac
- Bosch
- Parla
- LeEco
- Benefon
- Modu
- Tel.Me.
- Blackview
- iNQ
- Garmin-Asus
- Casio
- MWg
- WND
- AT&T
- XCute
- Yota
- Jolla
- Neonode
- Nvidia
- Razer
- Fairphone
- Fujitsu Siemens
- Thuraya


