Galaxy Note 20 Ultra - Secrets To Professional Photography! Tips #1/2🔥 By Gadgets Portal
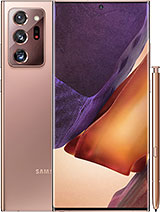
The camera of the new Samsung Galaxy note: 20 ultra is like no other not only on the quality but also in terms of options in terms of professional grade features at the rear. You get ultra-wide lens at the top 108 megapixel lens in the middle and 5x periscope zoom lens at the bottom, and the front camera is in a punch, hole on the display. Let's first talk about this awesome hidden feature when you are trying to take a macro shot. That is a close up of an object. You get this 2x option in the bottom right corner. It shows up whenever the subject is very close to the camera.
So if you click it, it zooms 2x, so that you get a clear idea about the subject, whether it's in focus or not, and it even guides you to move a little further. If the subject is too close to the lens, once it's in focus, you can go back to the one x view. There is a minimum focus distance for the main camera. That is the periscope zoom lens I am currently using, so it basically tracks the distance in between the lens and the subject and basically helps you maintain the minimum distance to get a crisp macro shot. So that's a great feature.
I will say you better crop the image later to get a more close-up photo, but an autofocus image is totally useless when you are capturing an image of a document with the help of the scene optimizer, which is powered by Bixby, you can take distortion, free straightened, square images, just like a scanner with this document scan option on. So let me take a picture of this notepad make sure the whole notepad or document is in the viewfinder. Then wait for a rectangle to show up around the document after that click on tap, to scan it's as simple as that, no need to rely on third-party applications which are prone to bug or data leak and also adware and malware. So here in the gallery, as you can see, the document looks like it has been scanned with a scanner. In fact, the text is also perfectly straight.
No distortion is visible, so another great feature. I really appreciate on the note 20 ultra so guys if you have zero idea, how to frame an object into the frame or how to take great shots. If your friends are always saying you are a terrible photographer, then Samsung includes this short suggestion. So whenever you are doing portrait, photography, landscape or abstract photography, a line will appear on screen with a bubble in the middle and if the AI, that is artificial intelligence of your note or detects a great shot, a bubble will appear on the object as well, so align those two bubbles, and you have a great shot and I like most of the short suggestions. There is another option here on the camera modes that is single, take which allows you to take a small video from 5 to 15 seconds and what it does is it records the video and finds the best shot in the video extract, the photos and even apply some photo effects or filters.
So if you have zero idea how to take a proper photo like a lot of people uh, then you can take help of this single shot feature. So, as you can see, this extracted photo is nicely in focus. There is zero motion blur. The whole object is in the frame, so the single take feature is actually very good. So next time you are on a tour, if you have really short time at any place, just take a single take video and the phone will suggest and also capture the best shots, and this can be also useful for taking your kids photos.
You won't miss a good moment. I briefly talked about the scene optimizer. It also detects what object you have in the frame and sets the best settings of the camera for the optimum results, and this is very useful if you are at home or if you are in a park with lots of greenery, if you are taking photos at night with less light, the camera switches to night mode automatically. But if you are a photography enthusiast, if you have basic idea or basic interest in photography, then this pro mode is for you guys. When you are taking low light photographs, the phone tends to set the ISO to as high as 800 or even higher, which makes the pictures very noisy, less detailed and not acceptable in some cases.
So you can set the ISO to a lower level to minimize noise, which should not be more than 400 and to compensate for the brightness or the light you can lower the shutter speed to 1, 10th or 1 15th or even lower. If you have a tripod or if you are taking photographs of still subjects or landscapes like sunset or night photography, you can go as low as 30 seconds, shutter speed and definitely use a tripod, but don't compromise with the sharpness or details unless you have to in the pro mode. You can set the white balance manually for dramatic lighting and on the scroll bar. You get the light source reference, for example, at 2800, kelvin uh, it's domestic lighting, and when you go as high as 4000 kelvin, it's a fluorescent light. Then, when you go to about 5500k or above that's daylight, and when you cross 6500 kelvin, that's cloudy or shade, and it goes to as high as 10, 000, kelvin, so suppose, you're at a beach, you want the lighting to be like a cloudy day.
You can tweak with the white balance and get desired results. Furthermore, you can manually set different attributes, like you can tweak with the shadows, with the highlights' saturation contrast or tint, and by decreasing the shadows or the contrast. You can get flat images like this to get cinematic look which can be also useful in post-processing. This gives a flat picture profile, look with high dynamic range, and in addition to that, there is, of course, a manual focus option uh in the video mode that is most dramatic. You can slowly focus or refocus, as you wish, and in manual focus.
You can ensure the part of the object you want to be in focus, and it helps in portraits. Furthermore, you can focus on the eyes, it's a must for macro shots and to ensure perfect, focusing this pro mode also includes focus speaking, which is so useful guys what it does is it helps you get a better idea about what or what is not in focus by highlighting high contrast, edges and in this camera the focus picking color is green, which is, I think, very suitable for most of the cases. As you can see, the green fringing around the text is moving further or near now. Of course, you can touch to focus which also sets the exposure, but what you can do is you can tap and hold to lock the autofocus and also auto exposure. So whenever you move the viewfinder, the focus, distance or the exposure doesn't change, suppose you're capturing an event with bright light.
If you lock the exposure and the autofocus, then if somebody comes in between your camera and the stage, the focus won't change, and also the stage will be much brighter compared to the surroundings which will make the performer overexposed. So you can lock the exposure in accordance with the stage lighting, which will make the stage perfectly exposed, even if the surrounding lighting changes. So this is how you can be a pro smartphone photographer now what happens if the stage lighting situation changes from time to time? Well, the new Samsung Galaxy note: 20 ultra also includes metering modes in the pro camera mode, so, firstly, you get center weighted. That is, the exposure is determined by concentrating on the central 60 to 80 percent of the scene. The most advanced option is the matrix or multimetering zone.
That is the camera measures, the light intensity in several points of the scene and then combines the results to find the settings for the best exposure, whereas in center weighted the exposure is set by the central part. If the subject is around the edges, then it might not be a good option and, lastly, you get spot metering, that is, the camera, will measure only a very small part of the scene, maybe less than five percent, and it's by default, the central part. But if you tap to focus to a different area, then the exposure will change accordingly, and this is best suited for event, photography that I mentioned before, even if the stage lighting changes, another great useful feature is subject tracking and of course it works in the normal camera mode, and if you just tap on a subject, the camera will track the object. Even if you move the viewfinder, that is the phone or the subject itself, the phone will track. That particular area of that particular object.
Keep that in focus, which is useful in sports photography like if your kids is riding a bike, you can tap on the bike and the phone will keep the bike in focus. You can also subject track your kids face or your pets or any moving object. Now guys. Let me share with you a shorthand tricks. You can move the shutter button anywhere on the screen and tap to take pictures or videos which can be useful, since this is a very big screen.
You can also take burst photos by swiping down on the shutter button to the bottom edge and hold to take multiple photos. Furthermore, you can later choose the best one and discard others. Furthermore, you can also tap and hold on the s pen button to take burst shots. I have shown you the s pen tricks on the camera in my tips and tricks, videos so check the description for the links guys. This is the end of Samsung Galaxy note, 20, ultra camera tips and tricks part one uh click on the thumbnail showing on the screen for the part two.
The link will be in the description as well. If you think this video was a little helpful, consider subscribing to this channel. This is showcase. Signing off have a great day.
Source : Gadgets Portal


