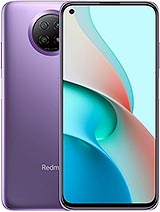
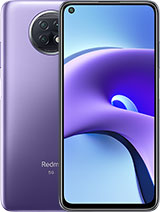
Xiaomi Redmi Note 9T 5G - Setup Recipe By Tech Travel Geeks
Hi there it's Lukas for the tech, travel geeks, and today we'll be preparing a nice and fresh Redmi Note 95g by Xiaomi, which we just received from Xiaomi for review. We'll show you the whole process from the ingredients required cooking instructions up to some of our thoughts about what the software tastes like. If you haven't already make sure to subscribe to the tech travel geeks here on YouTube, alright, to prepare today's meal, we'll need the following items: an apron scales, digital or analog, a cutting board, a sim card or two, if you're feeling package a micro, SD card optional, a sim ejector tool, a phone- in our case, the Redmi Note 95g by Xiaomi and a drink I'll, be using Earl Grey tea. But it's entirely up to you in our last video, we packaged the phone. So if you need instructions for that, go ahead and check it out on our channel once it's nicely unpacked. Remember that it's not a vegetable, and you shouldn't wash it especially that the phone is only splash proof.
So it might not end well, however, make sure to wash and dry the cutting board thoroughly before you begin. Let's start with the preparation stage and put all the ingredients on the cutting board I'll be using my three NATO sim card with 5g, so you can properly enjoy the taste of superfast internet on the go I'll, also be using a 64 gigabyte sun disk card to keep all the tasty photos in here and have more space whenever I need it. Ok, let's open the oven with the sim ejector tool. The sim door is, on the left hand, side once you take it out. You have plenty of space.
You can fit two juicy sim cards in the two slots, which is great, so let's put one into the slot one. The larger space is for the micro SD card. So let's do that as well. Both face up now that we're done, let's put the tray back into the oven again with face up, so we can start the actual cooking. The phone is quite a nice specimen weighing in at 204 grams, including both cards fantastic.
Now we're ready to turn it on using the side mounted button, we get a nice animation with mini 12, which is the operating system for Xiaomi the latest until mini 12.5 comes out in the near future. The process starts with selecting the language I'll just go with English we're in the UK. So that's the region we'll choose but feel free to use an alternative depending on where you are then there are the terms and conditions make sure to read them all. To avoid burning yourself by accident, health and safety. First, once your happy just tick the button, and you're ready to go.
You then need to log in to your Wi-Fi to be able to download all the recipes you might need. You'll then see if there are any software updates for you, nothing in my case. So, let's move on you don't have a choice to copy the apps from another phone or start from scratch. I wanted to start from scratch to avoid my phones becoming too bloated, plus it's always better to show the entire process in the video. The next step is to log into google to be able to download apps from the play store, etc.
So, let's do that next, the password all good. You might also be asked to confirm if it's you on your other phone, if you have two-factor authentication in google, it's always better saved than sorry. You'll also be asked if you want to keep your account updated with this phone's number, and they went ahead and did just that. There are also google's terms of service, but in this case I trusted google, as it's not really possible to use the phone without it. What else can you do? You can then pick which services you go for, including backup to google drive access to your location and Wi-Fi scanning, as well as sharing usage and statistics data.
I opted out of the latter, but it's entirely up to you since we're in Europe. We then can choose which search engine will be using thanks to the search provider selection screen. The list will depend on the country you're in. I just went with Google as that's the main search engine I use anyway. You can then decide if you want to continue with the setup or return to it later, but I'll just continue to have it over and done with.
Then there's the Google Assistant setup. If this isn't your first android phone, the Google Assistant setup shouldn't require anything from you, but if you haven't done so recently, you might be asked to set it up. It wasn't required in my case next. This screen allows you to make some further changes, including adding a different email account. Changing the font, size, the wallpaper or to review additional apps interesting.
All the apps were from Google, and it didn't look like it was possible to disable anything. Oh, well. Also, the wallpaper selection screen didn't really work for me. I was getting a blank screen, so I'll come back to it once it's finished in the next step, you can log into your me account. Unfortunately, I was having some issues with it.
As entering my details, took me to the account page, but going back logged me out and when I tried a different approach. It wanted to send me a text, but it wasn't displaying on the screen. So I'll also try doing this later now. For the fun part, security I'll definitely be using fingerprint unlock, as it appears to be working great. So, let's set it up before it.
You still need to pick either a pattern, a pin or password. I went with a pattern adding the fingerprint took a minute to ensure all parts of my thumb are correctly recognized, but as I'm recording the audio I've been using the scanner for a few hours, and it's working great. I also later added my left index finger in case. Furthermore, I want to unlock the phone with my left hand, and it works great as well. Furthermore, I'm really happy with it so far.
The next step is similar to an earlier one, and I disabled, sharing diagnostic data, but kept the automatic system updates and personalized ads to make sure any ads are more relevant to me rather than being completely random. Speaking of which a quick side note, it looks like there are fewer ads visible on this phone than the Poco f2 pro I tested earlier. For example, they're not visible in the games folder or the more apps' folder anymore, which is great to see one of the most important choices is on the next screen: either pick the classic launcher or one of the app drawer. I can't personally live without the app drawer, so I went that way. The next one is the theme either limitless or classic, and I just went with the classic this time.
Great we're all done, let's close the oven, set it to 220 degrees Celsius and wait until it's all nicely baked with all the apps and settings. In my case it took around 90 seconds, which is not too bad. Okay. Before we go, let's get a quick taste of the software and user experience. The notification bar shows the setup is still ongoing, but we need to configure the SD card.
I had formatted it on my Windows PC, but the phone needed to do it again. So let's do that just make sure you don't have any important things there checking the apps we can see. There are quite a lot pre-installed. Luckily you can uninstall most of them. For example, let's try to remove some games.
I won't be playing no problem. You can remove them quite easily, but let's check one game for fun: a space shooter. It seems to be working fine, but would probably require two hands, since the phone is quite big. Let's check the play store straight away. It's asking me to install to protect Scotland app, which is the right thing to do in the current global situation.
I'll skip the setup process for you, though, as it takes quite a while back to the notification shade. The phone picked up. All the news and notifications from my other devices and even connected to my Sony, xm4 headset automatically, which is great, there's also a tutorial about a new mini 12 feature floating windows which allows you to have some apps running on a smaller screen, which should be quite useful going forward. Let's now check some settings, I do have some Xiaomi apps to update. So let's do that.
In the background, the 5000?m power battery should work great. It came at 60 charged and should last for way over a day, make sure to check our upcoming review for more information about that. My favorite about phone screen shows that we're on mini 12, with no updates there's plenty of storage with around 19 gigabytes out of 128 gigabytes occupied, plus the SD card, which should keep me happy for a while. The all specs screen confirms that the phone has 4 gigabytes of memory and an OCTA core processor and is using android 10 and the November 2020 security patch, which is not too bad, but around 2 months behind Google's the latest patch. We can also change the screen's color scheme.
I prefer the dark mode. So let's do just that. I can also finally change the wallpaper it looks like live. Wallpapers aren't really available on this phone, but let me know in the comments: if you know how to do it, I can still change the normal one, similar to the one I had on Poco f2 pro. I think that looks good.
The screen looks good so far as well. I had a quick look at extinction on Netflix, and it looks good. The same with YouTube, you can either have sidebars and see the whole screen or zoom in and have a more cinematic experience, but with some top and bottom parts cut good to have that choice. Finally, let's have a quick look at the camera. It uses a similar interface to what I had on the Poco f2 pro.
So that's great. The camera supports pro mode, which has a lot of extra features and also allows you to take 48 megapixel photos rather than the usual 12 megapixels, with pixel binning there's also, the portrait mode, which also worked fine on my weak cactus, make sure to check our full review coming up in the next few weeks to hear more about the camera performance. Alright, that's it for today hope you like this rather different video from us. Let us know in the comments below what you think, if you haven't already make sure to subscribe to the tech, travel geeks and hit the notification bell to be notified about any new videos from us. Thanks for watching bye,.
Source : Tech Travel Geeks


