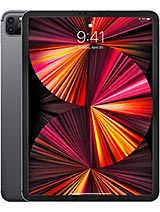
iPad Pro 2020 11 Battery Replacement | Teardown By Geardo
Hi everyone welcome back to gear. Today we will show you how to replace the battery on the iPad Pro 2020 11 inch edition before starting. We need to have the right tools to proceed with the repair which you can find in the description. The most vital part of the iPad repair is proper heating. For this we can use a heating pad designed for tablets and mobile phones on iPad devices, make sure to hit the front side, select the tablet heating option and leave it till the heating completes. Alternatively, you can use a heat gun or something similar once the heating has done use a suction cup on the sides to lift the front screen in between insert a couple of plastic carp rid tools and cut the adhesive around, be gentle while pulling the reflex cables attached to the logic board.
Once the separation has completed, pull LCD and slide down to take off the shield by undoing two screws. The top cable with this shot pay attention, while removing it and then disconnect the connector next, lift the screen to 90 degrees, just like halfway through to open a book and undo three screws to remove the shield and then disconnect four connectors to pull out the screen. Next, on the charger port undo, two screws and Nebraska heat to soften the glue and then peel out the cable next on the top right, undo, five screws and take out the shield and then disconnect three plugs to take out the rear, camera next undo, two screws and take out the power flex, cable and the button next at the top center undo four screws and take out the shield next take out the front camera and face side module by undoing two screws and disconnecting three connector plugs. The flex. Cable has little sticky on it, gently peel it and take it out.
Next, on the logic board. Peel the copper adhesive tape next on the logic board, undo five screws and take out the shield and then disconnect two connector plugs next on. The bottom left of the logic board, take out the blade. Next, on the bottom disconnect the smart connector plug and then unplug four speaker connecting plugs next, on top of the logic board, disconnect four antenna plugs four speakers, connector plugs and the volume flex cable make sure to peel the antennas away from the logic board. In that way, we can make enough room to pull out the logic board.
Next, apply the heat on the battery side to soften the glue under the battery and the logic board, and then by using a pry tool, gently lift the board, but sometimes the sticky can still hold the board, then use a plastic car pry tool to cut the adhesive under the board, especially on the l-shaped board part needs to cut the glue to raise the board. Now you can take out the logic board next to take out the battery peel, the tabs and pull out the sticky, be gentle in this process and again a title heat to soften the glue under the battery next, by using a pry tool, lift the battery while cutting the glue under it. This process will take longer. The adhesive under the battery is hauled in tight. Now we can take out the battery next, replace the new battery and place it on the board, with the sticky tabs on it and then place.
The logic board in the body make sure the board sits securely and start adding screws lock in five screws and connect two plugs with the shield. Next connect four speaker plugs with the plate on the bottom. Next connect the smart connector plug next lock in the charger port by adding two screws next place, both antennas and connect them to the board, including the other two antennas on top and also connect two plugs, which includes the volume flex. Next connect four speaker plugs with tapes on the top next secure the camera by connecting three plugs and then at the power button and flex by clicking the plug and add in three screws. So do next add the front camera and face ID module by adding two screws and securing three connector plugs.
Then add the shield by adding four screws next paste, the copper ADC strip on the logic board. Before that verify all the connections are secured and shields and tapes are added in the logic board. Finally, add the screen to the body by connecting the LCD and touch connectors, make sure the connection is secured and then add the protector shield by inserting three screws. Next move to the top. Take 45-degree angle, like closing a book slide, the screen down and connect the top connector to the logic board, ensure the connection is secured and then place the shield by inserting two screws now to clamp up the iPad slide in the top section first and followed by the bottom click in the top section.
First then, simultaneously, click sides and the bottom just make sure to put the pressure on the frame sides. Hope you have enjoyed the battery replacement guide. Let us know if you have any questions, please like share and comment on. Our videos do not forget to hit the subscribe button.
Source : Geardo


![Top 5 Best Camera For Photography [2021]](https://img.youtube.com/vi/XyYmbmguijY/maxresdefault.jpg )


