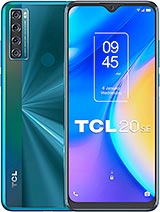
How to Perform First Setup on TCL 20 SE – Initial Configuration By HardReset.Info
Welcome and phenom is a tlc20se, and today I will show you how to go through the setup process of this phone and when you boot it up for the first time you will present it with the welcoming screen, as you can see right here, although it is in a different language for me, so I'm going to quickly change it to English. There we go and from here we can tap on start. This will take us to the page where we have the option to insert our sim card now. This step is completely optional, and you don't have to do it, or you can do it later on. If you want to uh the truth is at the moment you insert your sim card into the device. It will start working without any kind of problem, so it is a little redundant here.
Next page, we have Wi-Fi connections. So again you can connect to Wi-Fi. If you have one near you, if you don't do worry, you can just simply skip it as well um. So that's what I'm going to do now I'll mention uh one little thing. So if you choose not to insert a sim card nor connect to the Wi-Fi, you will have to most likely change or check or set it up a date and time yourself manually, because it might be incorrect, and also it will show up throughout the setup, while, if you connect to one of those either insert a sim card or Wi-Fi uh date and time will be set automatically additionally uh without any kind of network connections.
You also won't see the Google account option to log in throughout the setup, but anyway you can do that after the setup is complete through settings anyway, so we'll set it up offline, and here we have the date and time that I mentioned before. So you can check it. Uh set it up yourself. If it's incorrect, if you're planning to connect to Wi-Fi later on, you can disregard this, it will be set automatically once you do connect. So if you don't really mind it, you can wait and then once you connect, it will be all set correctly.
Now, next page we have Google services, so you have location scanning and sending user and diagnostic data. Now you can read exactly what these do by tapping on this arrow to expand the explanation to each one of those settings and at the end of the day, if you don't like it, you can disable it like. So go all the way down and select accept, and this will take us to protecting our device. It looks like it automatically defaults to a fingerprint, so it tells you to put in a fingerprint which also will give you the option to set up a pin pattern or password. As you can see, you can also choose to opt out of both of them or, if you plan, to use as an example, just a screen lock like a pin pattern or password, but not a fingerprint, then choose whichever one you want from here.
For instance, if you want pattern select pattern, then you need to only draw the pattern. Repeat: it confirms it and when it opts into the fingerprint you can just go back and skip it now. This will keep the pattern, but not the pen or not the fingerprint so from here. We also have the option for uh face unlock, which I don't really care about, so I'll, skip that as well, and we have chosen domain dominant hand, select whichever one you want. It will set where the uh, where the back button is located on which side, so I'll go to next and keep it as it is.
Then we have a at vision, use some kind of contrast, brightness saturation improvements to the colors of the display, so you can disable it and enable it depending on how you like it, I'll, go to next and completely disregard it. Then we have home screened style. So we have two different styles that we can choose from. We have the home screen and a drawer screen or hob drawer probably would be more play named, but this is basically the typical android, where all the applications are in an app drawer, and you can also access your home screen with only several apps. So it's a little more clean, while the bottom one will have all the applications on the home screen.
So this is more resembling something like an iOS device. So anyway, I'll tap on next from here- and here we have lock screen setup, so we have DLC style and classic, so you can choose whichever one you like more. The difference between them is just aesthetics, as you can see so choose whichever one you prefer, and that will finish up the setup. So let's stop on finish and there we go. Oh, almost there we go.
We have some TLC stuff, so there we go, and now we're finished also gives us some kind of guide on something. There are privacy, ops, with two fingers swipe up whatever so yeah. That is the setup. So if you found this very helpful, don't forget to hit like subscribe, and thanks for watching you.
Source : HardReset.Info


