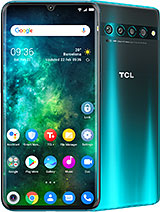
How to Bypass Google Verification in TCL 10 Plus – Remove Google Protection By HardReset.Info
Welcome from a TCL, 10 plus, and today I'll show you how to bypass the Google verification screen so to get started. You will need to connect to Wi-Fi and from there you also need to change the language to any kind of other language that uses a different keyboard. So I'm going to start off with doing uh well changing first, the language, so Greek, Russian and any kind of other languages that have a different keyboard. As you can see, right here will work just fine, so I'm going to go with Greek right here and then let's progress through this setup, so you want to skip most of it now if it's going to be easier for, you can connect to Wi-Fi beforehand. But for me, it doesn't really make much difference. You can see you can connect by simply tapping on it and let's wait it's going to give us a screen that it needs to be verified or the Google account needs to be verified.
So, as you can see, there is one way of unlocking the device uh through the pin and that was set on the device before, but we can also top right here to use Google account. So you want to select it and from here tap on a field and to bring up a keyboard, so you want to hold the globe icon, so hold it and go. It will pop up the two keyboards that are right now active, so you want to tap on language settings right here. The text then tap on change keyboard and from here you can add any kind of keyboard that uses an oh any kind of keyboard that doesn't have an arrow. Next to it.
As you can see, there are several arrows, I'm going to start with the first one then tap on add, which is the blue button and, as you can see now I have three so from here. We can go back to the first page, oops first page and change the language back to English and then again progress back to the locked screen. Let's use the account instead and again tap on the field, and again I'll hold the globe icon and go to language settings. Add keyboard scroll down to an option with an arrow which happens to be Albanian, tap on the three dots, go to open feedback and then describe your issue. You want to type in a Morse code now because you probably haven't changed the keyboard uh like I did by mistake.
Um you want to hold the globe icon and choose qwerty. So as you can see, alphabet qwerty so select it, and then you have normal keyboard. So in here, let's type on use, Morse code or simply m o, and it will suggest us use Morse code as a search result. Select it tap on a video once it loads tap on three dots and go to watch later, which will open up web browser, accept and continue, and no, thanks. We don't want to sync anything and now tap my search bar right there, and you want to navigate to hard reset dot info website so or reset that info open three bars and go to the download category and then download search bar.
You wanna search for android 7.1.2 like so. Let's search there should only be one result, as you can see so: FRP bypass, android, 7, 1, 2 and 10 stop on download scroll down and this time around, you want to hold the download link and choose open an incognito tab. We do it this way so to prevent any kind of problem with the download which sometimes happens uh. It basically occurs that you start downloading and the download, which is a hundred percent and never finishes, and because it never finishes, you can't really open it and this opening up incognito. It will solve that problem.
So from here once you get this pop-up, you want to tap on okay, and once it's done downloading choose open now to install it we'll need to go into the settings first and then allow from this source go back and install, and once it's done installing, let's just tap on open and continue and as you can see, it will tell us that the app has craft. It's really matter now. I can go back, go back once more and once more there we go. So you want to get back to the download search field right here and remove the android, 7.2 and now type in settings. So, let's search it and again, there should only be one application right here.
So android settings, APK, download scroll down again hold it open, an incognito tab, okay and open, install and open it up. Okay, now before I get started uh or continue the process, I will mention that if you go back right now, it will take you back to the web browser, and I'm mentioning this, because if you want to get back to the settings because, for instance, you might tap on that button one too many times, and it will take you too far back to get back into the strings. You will need to re-download and reinstall the application and then again once it's done installing you choose open, and it will take you back and from there. You will continue where, whatever you left off, whatever you basically left off the process so um to start off, we will need to go into the apps right here then view all 46 apps tap on three dots and show system scroll down, whoops scroll down to g c d. F, let me go t, so we're looking for Google Play Services and play store, so you can see both of them over here.
Let's go with the services, choose to disable disable up now, as you can see, it tells us that the app crashed it doesn't really matter. It already has done its purpose, which we'll see shortly um google location services disagree. Let's go back because, as you can see, this is already disabled and now, let's go to play, store again. Disable up, go back and now have two of them disabled. So from here we can go back further back to the main settings page right here, and I'm gonna now scroll down to accounts tap on an account choose to google, and this is what the app that keeps crashing allowed us to do.
Normally, we would not be able to add a Google account at all this option, wouldn't be even visible and that app basically allows us to have a Google account as an option. So in here you want to log in with your Google account. If you don't have one, you can always create it, even though you have an option to create it right here, I would strongly advise you to do it on your computer or some other device. I haven't tried it through here. You can also create an account specifically for this purpose right here to bypass it.
If you don't feel comfortable using your personal one. Now I'm going to use my personal anyway, so it doesn't really matter here so simply insert the email, and hopefully I actually remember the password. So let me try to I'm going to put it in so okay, so I didn't manage to get it right. So, as you can see, I did log in uh so from here. Let's talk, and I agree give it a moment and there we go.
So we have the account so from here go back, and you want to go back to the apps again, see all 646 show system and scroll down to g. There we go and there we go. There is the two apps that are disabled and you want to re-enable them back up, so enable disregard, enable go back and once those two apps are enabled hold parking. So once it boots back up we're going to progress through this help screen once more, and there will be a key difference that you can see right away almost right away and there it is so. This is previously the page that was telling us to verify our account, and we needed to insert the Google account, and now it's just simply telling us that hey account was added, and it's literally the account that I have added uh as a new one and the uh and the settings so from here.
We can tap on next now also mention that the process is still not finished, the device is still not fully unlocked. So we need to basically skip through most of this at this point and simply get access to the home screen. So that's, basically, why I'm skipping the majority of this stuff and also, as you can see the app keeps crashing it doesn't really matter anymore. So, every time it just pops up just stop somewhere else and there we go. So, as you can see we're done with the setup and from here you want to go into the settings straight away: scroll down to system reset factory data reset and reset phone on stop on erase everything.
The phone will basically start the process of literally unlocking itself. So let's wait for the process to finish, and once it has, we should be downgraded with the android setup screen once more, so I'll be back once that is actually visible. So, as you can see now the process is finished and this time around, you can go to the setup process. As, however, you like, adding all your accounts and setting up everything that you like the device at this point, like I said, is now fully unlocked, so you can literally do whatever you want, and one clear indication of the process of the success of the process of bypass is the fact that we can actually now choose to set up an offline which the device would still be locked would not be accessible to us. We will be forced to connect to some kind of Wi-Fi now, once more, I'm going to skip the majority of this just to save on time and show you that I can easily set up the device without any kind of interference without any need to do verify anything and there we go as you can see, the device is now fully set up.
I didn't need to provide anything, so that is how you bypass the Google verification on the TCL 10 plus, and if you found this very helpful, don't forget to hit like subscribe, and thanks for watching you.
Source : HardReset.Info


