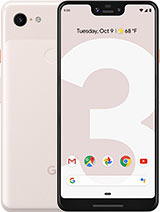
Google Pixel XL Battery Replacement (How to change the battery for ~$16) By Real World Review
Hello everyone- this is Matt from real world review, and today we're going to change the battery on the pixel XL. Just to note this will also apply to the 5-inch pixel as well, so the tools that we will need will be a t5 bit a razor blade, a pic of some sort, something bigger for prying the battery like this plastic card, some glue or adhesive, and some heat. You will also need some clamps for the drying process. So the first thing we want to do is remove the screen feel free to check out my screen replacement video for a more detailed explanation of how to remove this screen, but for those who have the screen removed. Let's speed this up once the screen is lifted off the phone, we can use the t5 bit to remove these two screws, along with this metal panel and unplug the screen. Next, we want to remove the two screws at the top, the one screw on the side, these two screws near at the bottom and then the four at the very bottom.
Once the screws are removed. We want to lift this plastic area of this metal panel and try and get a pic in there, so we can lift it off the phone. This may be a little difficult, so you may have to try some other areas just make sure to be careful around the battery area, which is on the bottom portion. Once the mid-frame is removed, we can unplug the battery as well as a charging port cable. You can either remove this cable or put it to the side like I did next once you've, worn or to is get a pry tool and start at the top.
The pic did not work for me. So I went to the credit-card style once you start cutting through the adhesive, you want to lift the battery just a little and then go on the edges. Like shown once one side lifts, then you can lift the other side with some force, and you should be good, just make sure you're, not bending the battery. Next. What you want to do is replace the adhesive strips right here in this situation.
I didn't need to replace it, so I'm just gonna, leave it how it came, then what we want to do is plug in the battery and set the battery down once everything is set, unplug the battery to make sure that no power goes through the phone and plug in the charging port cable on the bottom, as well as on the top once that's in we can plug in the battery, and then we'll plug in the screen to make sure that the battery works for this situation, the phone ended up being the issue, not the battery, so I did put the old battery in their next. What you want to do is clean up this metal frame, getting rid of all the adhesive on it. It's a lot easier to do rather than being in the phone. Well, if it's in the phone, it's still easy to do, but you do risk scratching up the metal piece around the edges. If you're, not careful, once the adhesive is removed, you can set the metal panel back in place and then put in all the screws, except for the two that hold down the screen.
If you're, having trouble putting the metal panel back in make sure that the antenna cables on the right and left side are lined up perfectly or else it may lift on those areas once the panel is in, you can clean up the screen getting rid of all the adhesive or most of it be very careful on this area, because you do not want to break that OLED screen once most or all the adhesive is removed. You can plug the screen back into the phone, put the metal panel back on and put the two screws back in next. What you want to do is test the screen, but in this situation the phone doesn't work, so we'll move on. Next, we want to apply the adhesive or glue I recommend using glue, and this is how I recommend applying it feel free to do it a way that you're used to but make sure that you get around all the edges and once you get towards the top make sure to be careful around the front camera and the earpiece areas you once all the glue or adhesive is in place. You can set down the screen and add pressure since I'm using glue I'm going to use clamps for the curing process.
Once you let the glue sit for about 30 minutes to an hour, you can clean off the glue, and then you're all set. Hopefully this video helped you out. If you have any questions, leave them in the comment section or on Twitter, I'm Matt of RR and feel free to follow me on the social media listed above also subscribe to my channel. So you can see more videos like this, as well as review videos and hit that Bell button. So then YouTube actually reminds you when those videos do come out.
Thanks for watching.
Source : Real World Review


