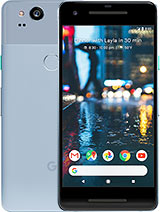
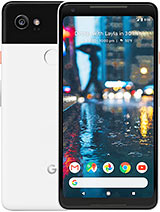
Google Pixel 2 XL Battery Replacement (How to change the battery for ~$16) By Real World Review
Hello everyone- this is Matt from real world review, and today we're going to replace the battery on the pixel 2 XL. I highly recommend doing this, especially if you're replacing the screen as well, but do know that it is very easy to break the screen and I don't recommend doing this repair. If this is your first repair in this situation, I am replacing the screen. So this is perfect, so the tools that you're going to need are going to be a pH triple zero bit a razor blade, a playing card, a pick of some sort and some heat. You will also need some clamps and glue. So what we're going to do is heat up the screen.
I recommend, starting with the top right, because there's not really too much damage up there, and we're going to heat it up a decent amount. Just so we can lift the glass, and we can get a playing card under the OLED panel and with that playing card, we're going to heat up the rest of the phone and cut through the adhesive, be very careful because you can damage the OLED, but, like I said, I don't need to worry too much about that, because we're replacing the screen anyway. I personally recommend heating up the top side, the left side and the right side and then finishing with the bottom of the screen. But whatever you're used to is the better option. Eventually the screen will heat up and once it is you're going to lift it up to the left side of the phone like this, and we're going to separate all the adhesives and then that screen is loose, and it looks like I did break the screen, but again it's whatever, because I'm replacing it anyway.
So the next thing we're going to do is remove these little pieces right here. I don't recommend using a razor blade, but those are definitely easier to remove starting with a little top area right here and then the bottom area right here then, with that pick we're going to unplug the digitizer and the OLED, and now we have the screen off the phone. Next we're just going to clean up this little area right here, it's not too difficult to do. The adhesive isn't really that sticky, so it should come off pretty easily to make sure it's perfectly clean. I recommend using like a brush or something like that to help then we're going to grab the pH triple zero bit and remove all these screws.
They should all be the same screws, but just in case keep them in order. Then we're going to grab the pick and lift on the right side right here, and this piece should just kind of pop out like that. Next we're going to unplug the battery, and we're going to try to remove the battery. This may be difficult, and you can use heat if you want to, but be careful because you don't want to add too much heat to a battery, and I recommend only heating it on the back, but this phone is metal, so it would make it pretty uncomfortable to do the repair, so I'm not going to use heat. All you got to do is just make sure not to bend the battery too much or else that could cause some issues.
So my method is cutting through the adhesive a decent amount on the bottom, and that way I can get onto the right side. Then we cut through the adhesive a little on the right side and eventually get to the middle, and then the battery should kind of fold out like this again make sure that the battery does not get bent. Then I'm going to remove all this adhesive, and I'm just going to put one strip right here. That should be enough to hold it in not to mention the metal panel. On top of it, then we're going to grab the new battery.
In this case, I don't have a new battery, so I'm just going to put the old battery in, and we're going to start by plugging it in and then setting it back in place. Once everything feels fine, we can just put the metal panel back on starting with the bottom area and then make sure that's relatively flat. Then we can put all the screws back in then we can start putting the new screen on so grab the new screen. I recommend plugging in the OLED first and then plugging in the digitizer, then we're going to test to make sure it works, and it looks like it does, and the touch screen works as well. So we're going to fold the screen over back like this, put these two pieces back on, and then we're going to line up the screen like this and apply the glue.
This may be a little difficult, but just hold the screen up while you're applying the glue, and should be able to get all sides like this. All you got to do is go around the edge of it and be a little careful around the speakers and the front camera, because you don't want to get any glue in that area. Once you've applied all the glue you can just set the screen down like this, and then we can grab clamps put them on the four corners and the best way to make sure you put this grin on properly is feel the right side, left side bottom and top and make sure that everything feels pretty much the same. Then you can put three more clamps on the left side, three more clamps on the right side, and then we can just let it sit like this. You can also put one on the top and the bottom, but you don't need to do that after letting it sit for about an hour and a half, maybe two hours or longer, you can take off the clamps and check to make sure everything's working so far it looks like it's working.
Fine, then. The next thing you want to do is remove the excess glue. All you need is just your fingernail or maybe a pick. You don't really need anything too crazy. You can also use some rubbing alcohol to clean it up, but using your fingernail seems to be the best for me and that's it.
Hopefully, this video helped you out. If you have any questions, leave them in the comments section or on Twitter Matt of RPR and feel free to follow me on the social media list above subscribe to my channel. So you can see more videos like this, as well as some review videos and hit that bell button. So then YouTube reminds you when those videos do come out thanks for watching.
Source : Real World Review


![Huawei Nova 7 5G In-Depth Review | Camera & Gaming Test [5G Beast!]](https://img.youtube.com/vi/Pq6YiUyPvwY/maxresdefault.jpg )


![BlackBerry KEYone Unboxing [4K]](https://img.youtube.com/vi/g_22smEK-fU/maxresdefault.jpg )


